So you want to create leopard print eyeshadow? We’ve got you covered! This easy to follow makeup tutorial will have you glamorized in no time. Use neutral colors for a natural glam, or swap out the naturals for a bold look! Either way, this look is bound to turn heads.
This post is originally published at Makeuptutorials.com
How To Create Leopard Eyeshadow | Makeup Tutorial
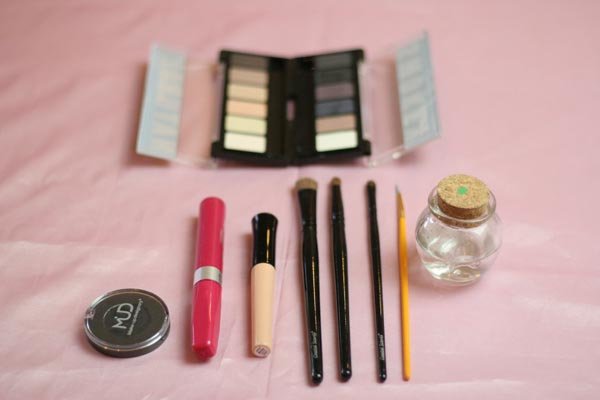
Supplies you will need to create leopard print eyeshadow:
- Eyeshadows
- Large Fluffy Eyeshadow Brush
- Small Eyeshadow Brush
- Round Pencil Eyeshadow Brush
- Thin Liner Brush
- Eyeshadow Primer
- Black Eyeliner
- Cake Eyeliner
- Mascara
- Water

Step 1: Prep the canvas.
Today we will begin by applying a small amount of eyelid primer to each eye and blending over the entire lid with our fingertips. We are using ELF Eyeshadow Primer, it cost $1 and works great! Why spend a fortune when you can have it all for $1?
Step 2: Accentuate your lids.
After you have blended the primer, we are going to use our large shadow brush to apply a light cream/goldish color to the lid. We are using the second color in the Natural Shadow Palette by NYX.
Step 3: Contour.
Next, using the same large brush, we are going to apply a light brownish tan color in a arch shape just above the crease of the eyelid. Be sure to blend, but make sure it doesn’t go all the way to the brow. We used the fifth color in the same NYX palette.
Step 4: Dramatic is better!
Now using the round shadow brush, often referred to as a pencil brush, we are going to apply a dark brown shadow at the outer corners of the eye. Travel it into the crease of the eye slightly to add drama and depth to the eye. We are using the sixth shadow in the above mentioned NYX palette.
Step 5: Connect the shadow.
Using a small shadow brush, apply the same dark shadow under bottom lashes. Be sure to connect the shadow to the outer corner.
Step 6: Highlight.
Using the large brush, apply highlight to the browbone and inner corners of eye. We used the first color in the NYX palette.
Step 7: Activate your liner.
Now you are ready to create your leopard print! Using a thin brush, dip it into water and work into your cake eyeliner. Cake eyeliner is a dry pressed powder that is activated with water. Check the consistency on the back of your hand to be sure it’s not too watery/ not too dry.
Step 8: “C’s” and “O’s”
To create the pattern, draw differnt sized “C’s” and “O’s” ABOVE the crease of the lid. Why above? So you can see it! Follow the crease of the lid for your guide.
Step 9: Wings wings wings!
The perfect accent to an animal print eye is a winged liner. If you prefer a straight liner, apply.
Step 9: More liner!
Apply black liner to the waterline to add emphasis.
Step 10: Finishing touch.
Apply mascara for the perfect finishing touch. For even more added flare, apply false lashes, and enjoy your look!
Don’t miss all of our latest and greatest makeup tips right here on YSP. Did we miss something important? Make sure to leave your comments in the comments section below! Your feedback is really important to us. The more tutorials you suggest, the more likely we are to do posts like that in the future. Check out all of our DIY makeup tutorials, beauty hacks, hair tips, wedding ideas, and so much more! At You’re So Pretty we pride ourselves on delivering you the most groundbreaking beauty products and videos on the market!