

Got a heart for DIY Halloween decorations? These spooky Halloween candles are easy to do and will make your home look even more haunted this Halloween. Check out our tutorial!
Halloween would not be complete without candles. I personally love candles especially the scented ones — such a therapeutic piece after a stressful day! Moreover, candles are also the most versatile decor I could ever think of: from birthdays, simple dates and of course, Halloween.
Whenever October begins, candles seem to have a new purpose to fulfill — fright intensifier! I believe it’s the gloomy glow of the candle that gives additional shivers whenever it’s lighted on Halloween.
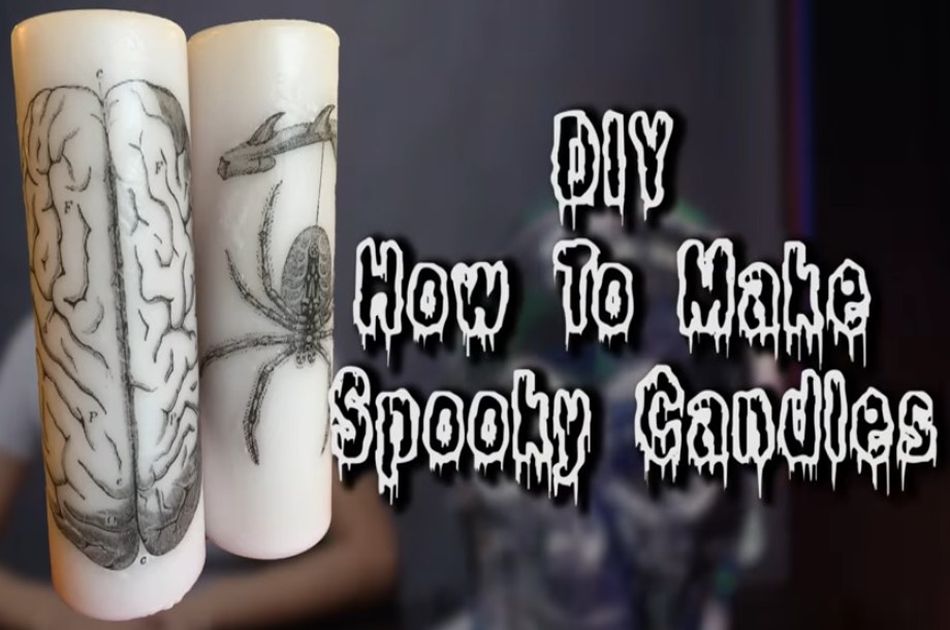
DIY Halloween Decorations | Spooky Printed Candles
Furnishing your homes with DIY Halloween decorations on a fright night is definitely worth trying. If you’re not really into arts and crafts, fret no more ’cause these customized candles are as easy as 123.
We’ve got the easiest DIY tutorial for you today, ladies and gents! If you’re looking to add some finishing touches to your spooky house, we’ve got the perfect project for you!
For this project you’ll need:


- 2 pillar candles – preferably white or light ones
- scissors
- tissue paper
- printer paper, ink and a printer
- iron
- blow dryer
- scotch tape
- glue stick
Easy, right? Now that you’ve gathered your materials, let’s see how it’s done…
Instructions:
Step 1: Tape your tissue paper onto the printer sheet


This is to ensure that your tissue paper doesn’t tear off while printing the image. I recommend taping EVERY edge of your tissue paper onto the printer page. I made the mistake of not taping every edge and cringed when I heard the tissue paper ripping in the printer. It was no bueno.
Step 2: Iron your tissue paper onto your printer sheet

This is basically to remove any creases or wrinkles. Obviously, put your iron on the lowest setting when doing this.
Step 3: Cut the image


When you’re ready to cut out your image, leave the tissue paper taped onto the printer page. Cut out the excess paper as close as possible to the image itself. Believe me when I say that this will make your life a LOT EASIER.
Step 4: Make it stick

Apply some glue stick onto the edges of the image so it would stick to the candle. Remember NOT to apply the glue stick on the entire sheet of paper. A big no-no!
Step 5: Put them together


Grab your candle and put the image onto it. Make sure that the edges are hugging the candle well.
Step 6: Use some heat

via GIPHY
Lastly, we’re going to apply some heat onto the candle. Well, not on the wick yet but onto the image. Expect for your candle to melt when you start blow-drying your image onto the candle. While this may not look nice, it’s essential to get your tissue paper to dissolve into the candle. And, if you think about it, it gives it a haunted Victorian feel.
Ta-dah! Your Halloween candles are all set to be displayed!
Check out the video tutorial of this easy yet spooky DIY candles from You’re So Pretty’s channel:

Don’t forget to have fun with this project! It’s so easy even a non-crafter like me could do it. And believe me when I say I don’t have a crafty bone in my body. With that said, it was still super fun making these candles and when lit, they look so eerie. They’re the perfect addition to your Halloween decor. Time to make your own now! Let us know how they turned out! Feel free to leave your comments below.
Looking for more ideas this Halloween? Click here!
Love this post? You will also love…
23 Easy Halloween Party Ideas For Adults You Should Try


Top 16 Group Halloween Costumes For You and Your Squad

Spooky Skeleton Makeup For Halloween
