


Thinking of something to do with your art materials left inside the box? How about giving life to the usual globe model you see in bookstores? After memorizing the continents of the world, why not try creating your mini-universe by making constellations? Did this tickle your mind? This is a simple yet creative project to do so read on and have your rotating constellation sphere in no time!
Do-It-Yourself | Zodiac Globe with Dazzling Constellations
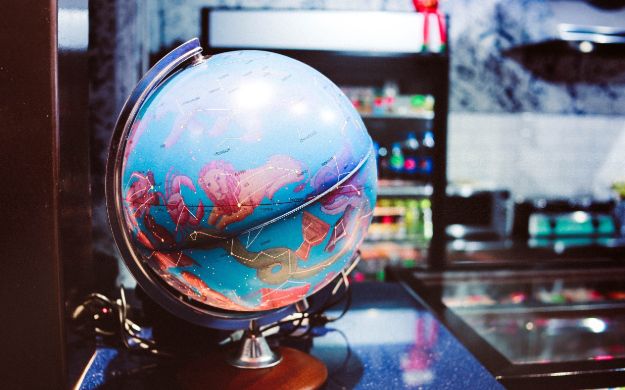
Crafty Idea of the Vast Universe
Stars are truly precious gems of the sky at night time and doing stargazing just to spot your favorite constellation is a fun thing to do. Why not try doing it in your room? Sounds cool, right? Just remember to wear old clothes or apron because we’ll be a little messy with paints. Are you ready for today’s project?
For this craft, you’ll need:
- globe
- 3 different colors of paints (for the globe, globe stand and the constellation)
- paint brush
- popsicle sticks
- pencil
- cornstarch
- small container (for mixing)
- astrology signs guide
With no further adieu, let’s begin!
Instructions:
Step 1: Prepare the Globe
Take the globe apart from its stand and remove unnecessary stickers which you may find on the globe itself and on the surface of the stand/base. If you will not remove these, it would make your project look bulky at some parts when coated with paint.
Step 2: Coat the base
To avoid leaving marks on your working area, place the globe stand on two parallel popsicle sticks. Get your first paint and paint brush and start coating it.
The number of coating that you will need depends on your preference and the quality of your paint. When it’s completely and nicely covered, set it aside.
Step 3: Coat the globe
Put a pencil on one of the holes of the globe. This will serve as your holder. Get your second paint. If what you have is a little light for your choice, you can add some black paint to darken the color. On the other hand, if it’s too dark, you can add white paint until you achieve your preferred color.
To achieve a ‘mattefying’ effect on your paint, you can add a little amount of cornstarch to it. Mix it thoroughly until completely dissolved. Once you’re done mixing, you can now start painting your globe. Remember to use only one stroke in coating it. Let it dry.

Step 4: Plot the stars
Using your astrology sign guide (which is accessible online), you can now start plotting the ‘signs’ or stars on your globe using the tip of a pencil dipped in a metallic paint for a shimmering effect.
Estimate the size and the distance of the signs around the globe to avoid wide spaces. You can also add personal touches to your zodiac globe like putting quotes or your name on to it. Once you’re done, let it be completely dry.
Ta-dah!
You now have a new zodiac sign-inspired accessory for your room!
For the full video tutorial of this project, watch for this video:

Being creative is limitless. All you need is a little imagination, some resourcefulness, dedication and patience while doing your craft. Having all of these together will surely result to an amazing project. So good luck and enjoy!