


Looking for how-to’s and makeup techniques? Look no further. I’ve got the scoop on all the best natural makeup solutions, tips, and tricks. Did you ever wonder how to properly apply your own concealer? Did you ever wonder how to make your own foundation using your favorite body lotion? Here is the ultimate list of do it yourself remedies for a natural look! We highly recommend checking out some of these videos and websites that feature make-up artists’ best kept secrets.
Dare to READ ON!?
Here is a list of the best makeup tutorials I’ve seen yet! Hope this helps!
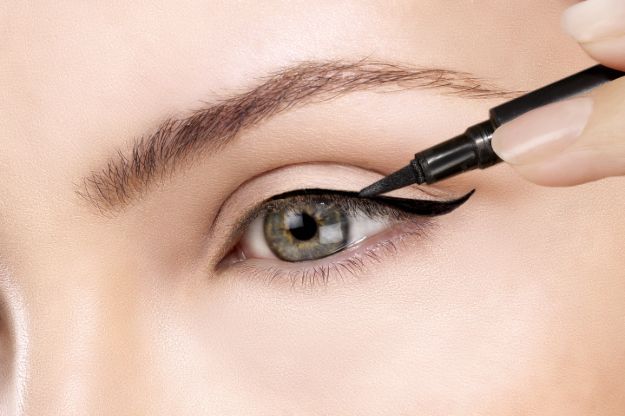
1. How to Properly Apply Eyeliner:
Eye Liner is tricky. It’s that annoying little step that makes your eyes look so much better, yet for some reason you hate doing it. Unless you’ve already mastered this art, here is a little trick that I find helps with ensuring perfect “liquid” line every time.

2. How to properly apply false eyelashes:
Now that you know how to make the perfect liquid line above your eye, you can easily apply false eyelashes! If you’re unsure of how to apply eyeliner, watch the Youtube video above for useful tips!
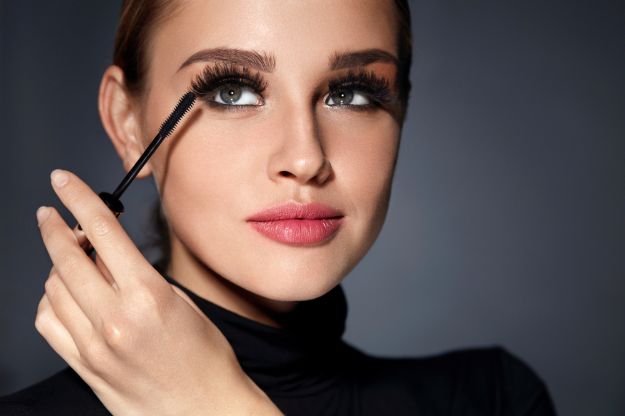
I prefer to use Urban Decay false eyelashes for the most natural effect! Of course, you can use any brand you like. I just like the way these make your eyelashes look. They’re really natural and not very exaggerated. They are a good day time false eyelash if that’s what you are going for!
Want to know what happens next? Watch the video for the best step by step application of your false eyelashes!

3. How To Apply Mascara Like A Pro
The steps are as follows:
- Wiggle the wand back and forth to really coat the roots and give the look of fuller lashes.
- Drag the wand through to the tips of the lashes and go through again until the desired effect is achieved.
- For extra drama, you can also coat the tops of the lashes. Start from the bottom and then do the same roots to tips method on the tops of the lashes.
- Go from the underside once more to keep the lashes from drooping.
The video is more instructive than a photo tutorial in my opinion. It’s easier to watch the technique and see exactly how it’s done:
View How to Apply Mascara on Howcast
4. How To Apply Eye Shadow (The Smokey Eye Effect)
The smokey eye effect is the most sought after look for eye shadow tutorials. Some people would say that this look is a bit much, but I completely disagree. I think the smokey eye does wonders for just about everyone. If you’ve always adored the look and never thought to try it – check out this step by step tutorial!
Put the primer all over your eyes (including your lids). Pat the primer on (it helps it to absorb and set your foundation).
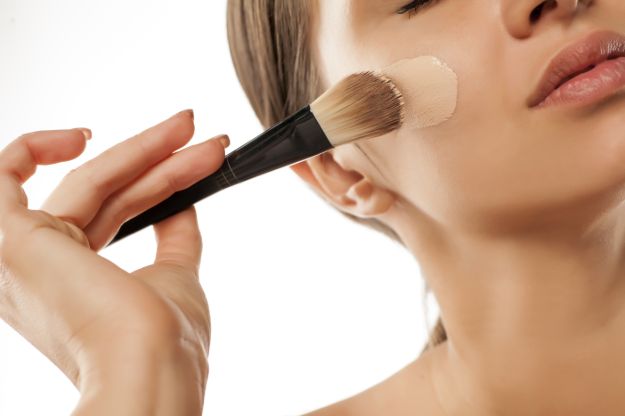
Once you’ve blended your foundation using a beauty blender, grab your favorite concealer. It’s time to hide those dark circles! Pat the areas around your eye with concealer and blend with a sponge. You can take this opportunity to use it on any imperfections in your skin!
Grab a neutral colored eye shadow. The tutorial here shows MAC’s eye shadow called Wedge.
Take a fluffy makeup brush and dust it all over your entire lid. You will use this color as a base color. This is the first step in making a smokey eye. After you’ve covered the entire eye area. Take a darker toned eye shadow (the model in the tutorial is using “Saddle” also by MAC Cosmetics).
Note: You may need to touch up your concealer because eye shadow will fall onto your cheekbones (this is okay).
Paint your lid with a synthetic brush (eye lid only).
Now it’s time to get out your blackest of black eye shadow. For this tutorial, we are featuring MAC’s color Carbon.
It is important to mostly coat the black on the eye lid. It is not supposed to be very dark on your brow bone, so just keep that in mind. As you move toward your brown bone, be softer with the application of black eye shadow. Less is more!
Take the shade of eye shadow that you used second (Saddle, by MAC) and line your lower lash line with a thin brush, like so:

Next, repeat the same thing, this time using Carbon black eye shadow on your lower lid
Gently push up on your eyelid (do not pull your eyelid down). Line the lower lid with a pencil like so:
Blend the outer corners with a synthetic eye shadow brush. Voila! Your eye’s should look like this:
You’re welcome to stop here if you like the look – For more awesome tips on enhancing this look, check out the rest of this video tutorial here:
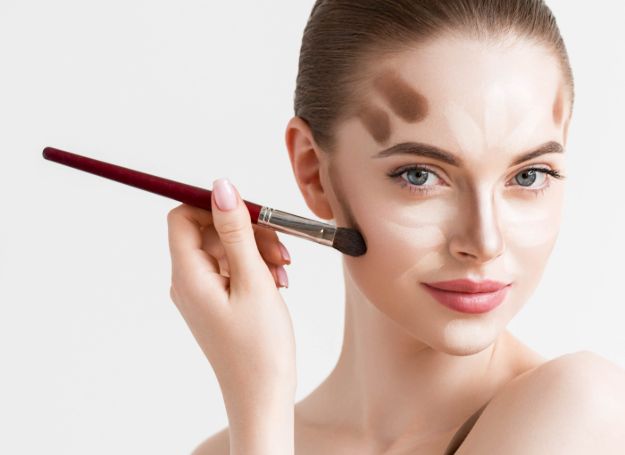
5. How to Contour and Highlight Your Cheekbones Like Kim Kardashian
Did you ever wonder why Kim Kardashian’s cheekbones always look perfect? She uses these simple contouring techniques to help make her cheekbones look perfect every time. It doesn’t take very long to add to your normal makeup regimen and will create a more professional look. It’s a helpful tip if you’re looking to create a dramatic look and still have time for coffee!

You Will Need:
- A Brightening Primer
- Highlighting Concealer
- Foundation Several Shades Darker Than Your Skin
- Foundation
- Setting Powder
- Bronzer
- Highlighter
Start with a clean face and apply your brightening primer. This will enhance your natural features and your makeup will last much longer this way!
To start highlighting, bring the concealer down towards your nose and to your hairline.
Next, go from the center of your nose towards the jawline. Then, highlight the center of your forehead and make a tree like shape. Repeat this on the other side and also highlight your chin! Make certain you are highlighting the center of your face where the sun would naturally hit.
Moving on to contouring…
Contour your cheeks, chin, nose, temples, and jawline. Lastly, contour your hairline. If you have a small forehead be very sparing with the amount of foundation you use there.
Blend out the concealer from under your eyes and above your chin. You want the concealer to remain bright, so do it separately.
Blend the darker concealer with a natural fiber brush. It creates dimension!
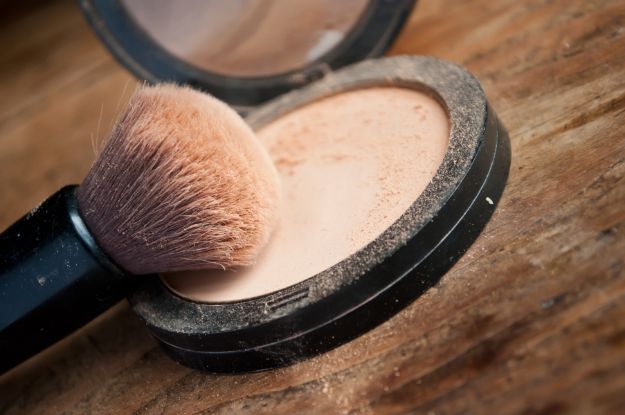
Next, set your concealer using a yellow tinted powder, but, you can use a translucent concealer if that works best for you.

For more great makeup tutorials – watch the end of the video to see what else you can do to contour even further!
6. How To Fill In Your Eye Brows (via missnattysbeautydiary)
Products used in this tutorial:
- Anastasia Highlighting Brow Kit
- MAC Eyebrows (Pencil) in the shade Spiked
- MAC Studio Finish Concealer
- MAC 208 Angled Brow Brush
- MAC 194 Concealer Brush
- E.L.F. Eyelash and Brow Wand (Spoolie)
- Tweezerman Brow Shaping Scissors
- Revlon Tweezers
- Eyebrow Razor
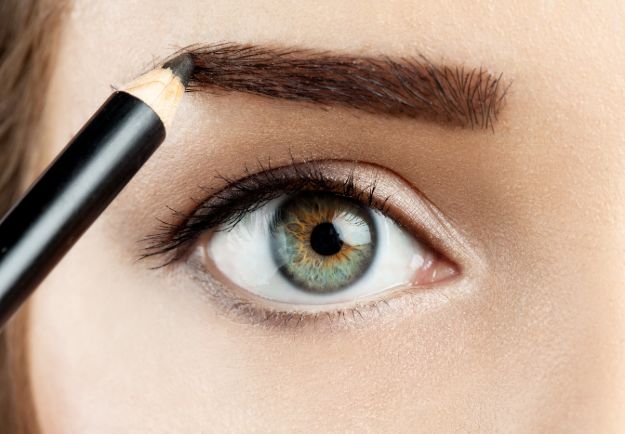

Voila! You’re all finished. This is what your brow should look like now that you’ve completed steps 1-14:
For a great DIY eyebrow makeup tutorial, check out this awesome video. Her eyebrows are fantastic! You can also use an eyebrow pencil like the one she uses in this video. My favorite eyebrow pencil is by Benefit!
7. How To Apply Lip Liner and Lip Stick
The key to ever lasting lipstick is the application of lip liner. Yes, it really works. In order to obtain the perfect lip you absolutely must try this trick! It works every time. I always get stopped and asked how I do it. It’s no secret! Check out this lip tutorial that will have you making the perfect lip in minutes!
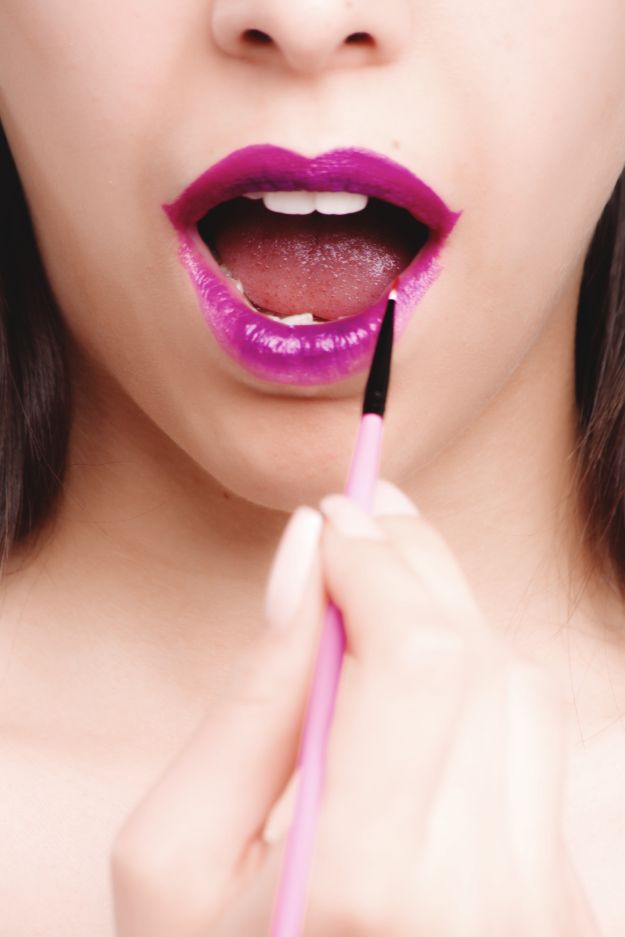

Your lip should start to look like this:
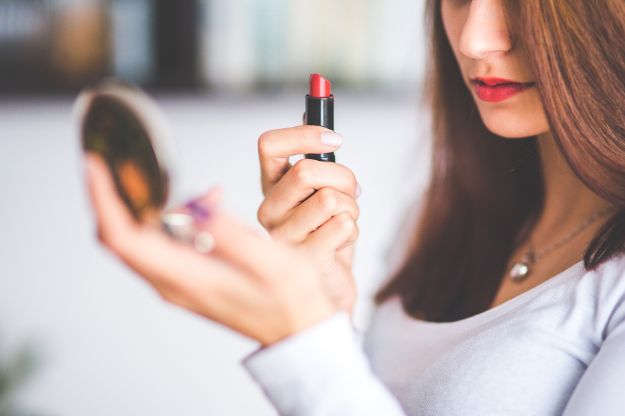
If your lip liner feels dry after applying, you can always put red lipstick over it. I like the way it looks just like the photo above. It gives your lips a great matte finish that it hard to accomplish when using shinier lipsticks. MAC makeup makes wonderful red lipstick colors. My personal favorite is Lady Danger.
Don’t miss all of our latest and greatest makeup tips right here on YSP. Did we miss something important? Make sure to leave your comments in the comments section below! Your feedback is really important to us. The more tutorials you suggest, the more likely we are to do posts like that in the future. Check out all of our DIY makeup tutorials, beauty hacks, hair tips, wedding ideas, and so much more! At You’re So Pretty we pride ourselves on delivering you the most groundbreaking beauty products and videos on the market!