
Calling all DIY ombré hair aspirants out there! Read through this article as I lead you to an awesome, really cool DIY Ombre Hair tutorial you wouldn’t want to miss for your Autmn-ready life!
Before anything else, here’s a fun fact: Did you know that the word “Ombré” is for men, while the word “Ombrée” is for women? Yep! But nevertheless, the word “Ombré” has been used generally for both men and women. Back in history, shading or ombré (french word) is a technique used in textile treatment. Later on, it became a trend in the fashion world down to hairstyling and was popularized by our queen, Aaliyah in 2000 until today. These days everyone is going crazy about it, and they even DIY their Ombré hair.
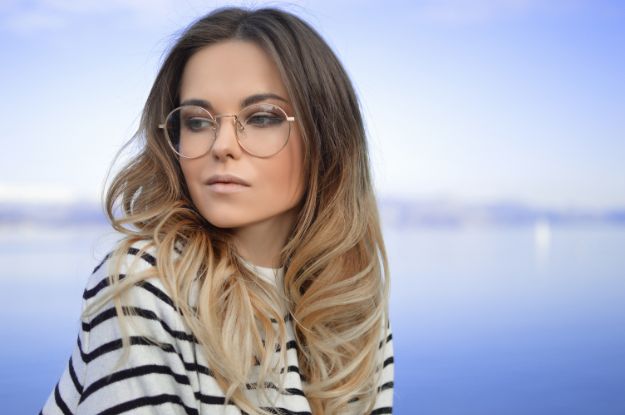
Fall Into Beautiful Hair Trends This Autumn With DIY Ombré Hair
DIYs sure do take trends to another level. And with hair colors (Gah! There’s literally like A LOT!) and hair trends consistently booming, video tutorials for these just keep on flowing. An Ombré hair is a subtle fade from your hair’s root color towards a lighter color to your tips. But these days, there are already plenty of colors and styles to choose from that you can mix and match and still achieve that faded effect on your hair. This DIY Ombré hair tutorial is for you, let’s get you ready for your DIY, Ombré Hair!
Things you need for your DIY Ombré hair:
- Chosen ombre hair kit
- Hair Clip
- Brush or Comb for teasing
- Mixing Bowl
- Gloves
- Dye Brush
- Aluminum Foil
Here’s how you can have your DIY Ombré hair:
Step 1. Mix Hair Dye
Mix the product according to the instructions of your chosen DIY ombré hair kit. Make sure you mix thoroughly and that you put the right amount of product to avoid discrepancies with the formula.
Step 2. Section Your Hair
Before you dye your hair to a fabulous ombré color, you need to section it. This depends on the length and thickness of your hair. Section your hair from the lower part of the back of your hair. Use your hair clip to secure your upper hair. This is important so you can apply the hair dye equally and you have control over the intensity of your DIY ombré hair look.
Step 3.Backcomb/ Tease Hair
This is actually a new style, I just saw my hair colorist do it back when I had my hair done professionally. She said it’s very important to tease your hair 5-6 times per section for a natural DIY ombré hair look.
Step 4. Apply Hair Dye From The Tips Upwards
Now for the fun part–applying the hair dye! Using your dye brush (or for this case, a paint brush) apply more product at the tips of your hair and gradually reduce the amount of product as you go upwards. This is so you can achieve the gradient effect a DIY ombré hair is known for.
1st Method
You can try the first method wherein you put the foil on the other side of the hair and use that as a base. Apply hair product from tips upwards using the paint brush to spread the product. Remember, more dye at the tips and less product as you move upwards.
2nd Method
The second method is easier because you just need to use the brush to apply the initial amount of dye at the tips and then spread it upwards using your fingers to achieve the gradient effect. This method is quicker as compared to the first one.
Proceed with the rest of the section of hair according to your personal preference.
Step 5. Wrap Hair in Foil
Make sure all strands have hair dye. Once done, wrap foil around the lock of hair and crumple or fold it to achieve maximum color payoff from the product.
Step 6. Repeat Steps 3-5 For Other Layers
Now that you got the hang of coloring your hair, repeat everything until you finish all layers and all sections. This is when it gets time-consuming but trust me, it’s all worth it in the end! Have a friend help you out per section or layer so your hands won’t ache that much. But hey, it’s a good workout!
Step 7. Leave then Rinse
For the last part–leave your colored hair to set for 45 minutes to an hour then rinse thoroughly with water.
Step 8. Blow Dry & Style
You can leave your hair as is but where’s the fun in that? Go the extra mile and do some blow drying or styling and take your new DIY ombré hair for a spin!
Watch the full tutorial by Gloss and Sparkle below:
Phew! That was literally super easy! It takes quite some time but hey–great hair takes time. 😉 You’ve got your ombre hair now and you’re super ready for Fall! You can purchase hair dyes from amazon.com if you’re still looking for the best ombre hair kit. I’m absolutely sure everyone’s gonna go crazy with your DIY Ombré hair. Isn’t this just #hairgoal achieved?! Also, don’t forget to take a selfié!
Know what lipstick shade best suits you in this article!
Featured Image via songofstyle
Leave a Reply