Got any books lying around? If you’re a glorified bookworm, I’m sure you have this problem. If you don’t have a bookshelf because of the lack of space in your apartment, stick around and learn a way to make one. This DIY bookshelf only takes up the available space you have and it’s cute too!
DIY Bookshelf Every Bookworm Should Have
A Creative Way To Save Space & Organize Those Books
If you don’t have a bookshelf, then most likely your reference books or paperback novels end up everywhere. If you want to put an ent to the clutter, you can actually make your own shelves. It is actually easy to make one. In fact, what’s good if you create your own bookshelf, it will cater to the space you have and will reflect your personal style. Check out this tutorial and you’ll have your books organized in no time.
In this project, you’ll need:
- Rubber Gloves
- A piece of cloth (an old T-shirt will do)
- A jar of stain (Minwax, Classic Gray)
- Paintbrush (the ones made for stain)
- Sandpapers (100-200 range grit)
- 1inch to 1/2 cm Screws
- Wooden boxes/ crates
- Level
- Electric screwdriver
- Wrench
Let’s get started!
Instructions:
Step 1: Wooden Boxes
Figure out which position you want your wooden boxes to be in. You can stack them vertically or horizontally depending on the available space you have or your style.
Step 2: Smooth out Surfaces
Sand the boxes and smooth the finish. Be sure to go with the grain. After sanding, use the cloth to remove excess dust.
Step 3: Stain The Wood
Now it’s time to stain the wooden boxes. Be sure to wear gloves first. You can transfer the stain to a different container or work with the can. Just make sure you mix it first. Apply the stain in one direction going with the grain. Once all your boxes are stained, dry them overnight.
Step 4: Apply Screws
Before you screw them all together, first choose one box that looks best. Turn it upside down and put it on the bottom. Stack the two remaining boxes on top making sure they level on top of one another. Then, apply the screws on each corner using the electric screwdriver. Make sure the screw goes in diagonally.
Tips: Clamp the boxes together with a wrench to keep the boxes from moving.
Step 5: Put The Boxes Upside Down
When you’re done putting the boxes together, put the boxes. Take note, the boxes you have on top now are the best box you chose earlier plus the screws are concealed.
Step 6: Attach The Boxes
Attach all the boxes together. Lay the two boxes (3 boxes each) horizontally on the top of each other. Make sure the boxes are level. You can use clamps if needed. Apply screws on the right front corner and the right back corner of each box. When you’re done, do the same thing to the middle box and the last box.
Step 7: Do the Final Touch
After applying all the screws, rotate the box right side up again. Go back and cover up any spots that needed stain. Let it dry overnight.
Ta-da! You’re finished
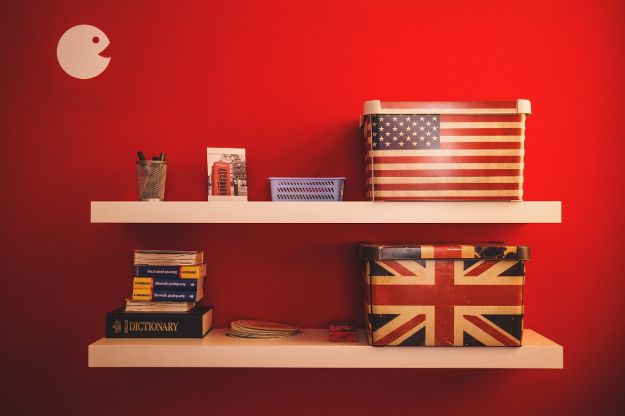
It’s cute, huh? Now you have a wooden bookshelf to store your beloved novels or any books you have. You can also place baskets inside to create a beautiful piece that would surely look great in your home.
Here’s the full video tutorial on how to make DIY bookshelf:
If buying ready-made or pre-fab bookshelves are not possible, there’s always a creative way to organize and stack books. DIY projects are most often than not the best solution.
A bookshelf is as particular to its owner as are his or her clothes; a personality is stamped on a library just as a shoe is shaped by the foot. ― Alan Bennett
If you want to see more awesome DIY projects, click here.
Like this post? You’ll also like…
32 DIY Mason Jar Crafts For Your Home
DIY Home Decor | How To Make A Terrarium
DIY Home Decor | How To Make A DreamCatcher
Leave a Reply